5 Ways I Find Unused Files Easily on My Mac and You Can Too!
Posted: June 14th, 2013 | Author: admin | Filed under: Uncategorized | No Comments »If you do routine maintenance on your Mac to keep it running its best, your maintenance likely includes getting rid of unused files. If you are doing that, then good for you, as it is a recommended part of your Mac’s routine maintenance. But you should know that you may be missing something. That ‘something’ is / are some unused files on your Mac that you can’t see. Getting rid of these unused files on my Mac is important to me during my routine maintenance, and it should be to you too if you want your Mac to continue to run smoothly.
You may think though, that since these files are not seen by you, and since they are no longer used, that they do not matter; but then you’d be wrong. This is because by still being there, these files are taking up valuable disk space and possibly even slowing your Mac down. Not to worry, there are many ways that you can find these unused and unseen files, and also ways to get rid of them for good. Let’s start with how to find the unused files on your Mac.
1. Use Spotlight in OS X
One way to check your Mac for files that are no longer being used is by using something you already have, which is Spotlight. It comes pre installed on OS X. It is fast and simple to use and you can modify your search to easily find the unused files on your Mac. When you open the Spotlight search window, you can set the parameters you want to find your files. You can search by the dates files were opened or when they were last modified. By searching with either parameter you can easily find old files because you can see which files you haven’t been using in a long time.

Ways to Search with Spotlight:
- Type of File
- Date last opened
- Date last modified
- Date created
- File contents
- File name
2. Check Your Mac’s Media Files
Another way you can find your Mac’s unused or old files is by checking your media files. Many times a duplicate file is found that has not been used and is not needed. The duplicate files you have not used can be deleted. It is easy to forget about media files you do not use, so checking these files and getting rid of those you don’t use is a good idea. Make sure to check all media including videos, photos, and music for files you don’t use.
3. Disk Inspector to the Rescue
You may have some big files sitting there on your Mac that have not been used in a long time. One way to find the files that are just taking up space is by using a program that will locate them for you. Disk Inspector is a program you can get at the Mac App Store. When you use Disk Inspector, you will be able to see results as it is scanning. You will have a sunburst type of diagram that will show you the files on your computer. Bigger files will be bigger in the diagram as you watch the visual scan. You can check the files shown in the sunburst diagram by using the Quick Look to get more information on the files. You can then easily locate the unused ones and remove them.
Features of Disk Inspector:
- Animated scan process
- Progress bar during scan
- Displays found files and folders during scan
- Quick Look for files
- Information about files
- Detailed volume information on files
- Display folder structure, skipping free space
- Copy path for items
4. EaseUS Clean Genius

Another program that can help you find those unused files is EaseUs Clean Genius. One of the highlights of EaseUS is that it checks your disk usage and locates unwanted large files that are not used. You have the option of removing the files once they are located. You can also find duplicate files when using EaseUS. When you have duplicate files you can safely get rid of one of them. This easy to use program offers you various ways to free up disk space. It is compatible with Mac OS X 10.6 or higher.
5. Use Grand Perspective
One more app option to help locate those files you have not used is Grand Perspective. This is a small utility application for Mac OS X 10.5 or higher. The program shows a graph like diagram showing you your all of your Mac’s files. Files are shown as rectangles in the graph. Larger files have larger rectangles. Files in a folder will appear together. You can check the files and find the ones that are not used and then get rid of them if you want to do so.
How to Eliminate These Unused Files on Your Mac for Good
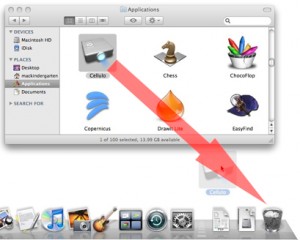
One way some of these files were created in the first place was how they were first deleted. By dragging and dropping them to your Trash you are not always getting rid of the file completely. Little bits and pieces, sometimes big bits and pieces, are left behind because your Mac won’t be grabbing all of the file. It just grabs what you see, which may even just be the icon of the app and not the entire program itself. It’s best then to either use the uninstall the app came with, if it came with one or use a program to help you destroy it entirely.

Some programs include AppZapper and MacKeeper. Both have uninstallers that will completely get rid of your unused files on your Mac. AppZapper is free and MacKeeper has a free trial you can use before deciding if you want to purchase it. Either way, before you start deleting files that you’re not sure of what they do, you may want to keep a backup, just in case. Being prepared is always a good idea. Once you empty your Trash or delete them with a program, you can get rid of the backup file if you find that everything is still running fine on your Mac.
Those unused files that are just lurking around taking up space on your Mac will hide from you, until you find them. So the next time you get ready to do your Mac’s routing maintenance, make sure to use some of the above programs or tactics to find your Mac’s unused, unseen, files. This way you really are making sure your Mac will keep running smoothly.

Leave a Reply