How to use OnyX for Mac
Posted: February 3rd, 2012 | Author: admin | Filed under: onyx mac | No Comments »Many Mac users feel that they do not need to run a cleaning program on their Mac ever. Others feel that Mac cleaners are good when and if their Mac begins to have performance issues or show a drop in speed. However, if you want your Mac to run at its best performance and remain its speedy self, then it is wise to use a tool like OnyX for Mac. Look at it as free preventative care for one of your most valuable assets.
Features of the OnyX for Mac include:Â
Disk maintenance, cache clean-up, index rebuilding, clearing the browser cache, font caches, boot, kernel and extension caches, as well as logs from crash reporters, system diagnostics and software update.
Let’s begin with a short tutorial that will help you know how to use Onyx for Mac:
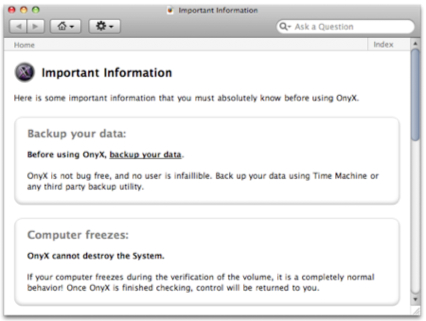
- Backup: As the screen shot from the OnyX utility shows, your first step should be to backup your Mac. This is preferably done prior to downloading OnyX to your Mac. You can backup your data using Time Machine or a third-party backup utility.Â
- Download OnyX: Before downloading OnyX, be aware that there are different versions of OnyX for your Mac. They are based on what OS your Mac has: Jaguar, Panther, Tiger, Leopard, Snow Leopard and even the newest: OnyX Lion. It is very important to choose the correct OS version as OnyX is designed to specifically work with each OS, and will not work properly with the wrong version.
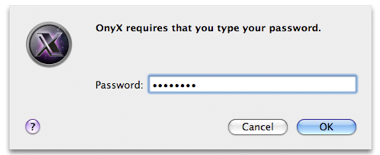
- Install: Install is very basic and similar to other program installations. Drag and drop OnyX into your Applications and Install will begin. At one point, after clicking through some permissions and hitting next a few times, you will be asked for your Mac system password. Enter the password and you are done with the Onyx for Mac installation.
- S.M.A.R.T. Status: OnyX will now verify the S.M.A.R.T. status and Startup Volume.Â
 Allow OnyX to run these diagnostic tools, and then prepare to wait as this diagnostic tool can take some time. The program will assure you that this is normal and to not worry. I am glad they added this warning to some of their diagnostic tools, as they can take quite a bit of time which may concern you if you were not aware of what was happening.Â
Allow OnyX to run these diagnostic tools, and then prepare to wait as this diagnostic tool can take some time. The program will assure you that this is normal and to not worry. I am glad they added this warning to some of their diagnostic tools, as they can take quite a bit of time which may concern you if you were not aware of what was happening. 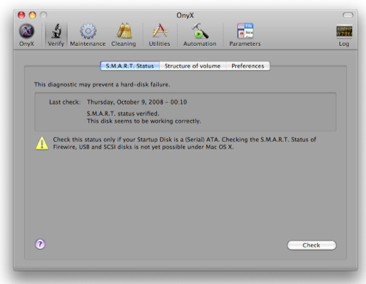 S.M.A.R.T. stands for: Self Monitoring Analysis and Reporting Technology. Most disks have S.M.A.R.T. hardware that is used to test and monitor your Mac’s hard drive. This tool will be checking its status. This diagnostic tool is important as it may prevent the failure of your hard drive. Make sure you use the S.M.A.R.T. diagnostic tool when you first use OnyX for your Mac, after that you can run it as needed.
The next step depends on what you do next with OnyX for Mac
5. Choose a Tab / Feature:
Verify, Maintenance, Cleaning, Utilities, Automation, Parameters
As you can see by looking at the screen shot below, each OnyX Utility tab will include its own list of tasks. At the bottom of the article there will be a short description of what each of these do.
In this scenario I have chosen to show you the Cleaning utility. Here we can see the various areas that we can clean are listed at the top, and the items that it will clean or things you wish it do are listed below. If you are unsure or have any questions about a task, you may click on the question mark in the lower left corner of each window.
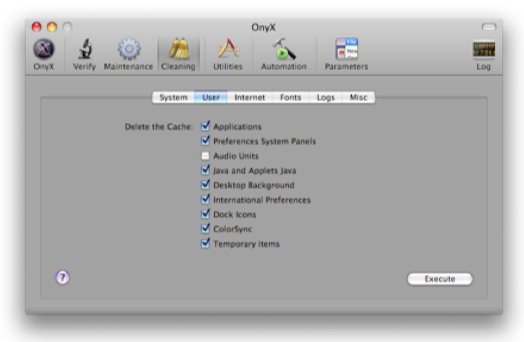 6. Execute: Once you have made your choices, click on the Execute button. Depending upon the task it again may take some time to work. Remember to be patient as some tasks can take quite some time to complete.
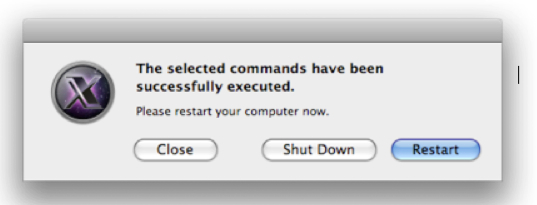
7. Restart (if prompted): Not every task will have you restart your Mac, but for those that do it is a good idea to do so when prompted.
My conclusion on the Onyx for Max program
After having downloaded and used Onyx for Mac myself, I encourage Mac users to install OnyX. Although it is free, I still found it to be just as good as some that charge a fee. The Onyx for Mac is a maintenance program that will help keep your Mac running in the perfect way that it should.
In addition to cleaning up your Mac, it can also repair some things that can help restore your Mac’s speed and performance. Something else I like is that there is an OnyX Lion version, which means that those of you that have Mac’s newest OS called Lion, can maintain it from the start. To learn further and more in depth details on how to use OnyX for Mac, use the OnyX help guide which includes a full tutorial.
Just a few notes from OnyX on what the OnyX for Mac features do:
Maintenance Scripts
Mac OS X includes a task manager (launchd) which automates System cleaning by executing the “periodic” utility. This utility runs three BSD standard scripts which perform many maintenance operations.
Cleaning
The Cleaning panel displays six tabs which allow removing the System Cache, User Cache, Internet Files, Fonts Caches, Logs, CrashReporter, and miscellaneous Temporary and Obsolete Files.
Utilities
The Utilities panel allows you to access Unix “man”-pages, to Force Empty the Trash, to quickly find a file or folder, to manage the Process accounting, and to modify the visibility status of a volume, folder, or file.
Automation
The Automation panel is divided into three sections and regroups the main functions of maintenance and cleaning.
Parameters
The Parameters panel displays ten tabs allowing you to personalize your working environment. The system and some Apple applications contain hidden functions that you can enable or disable in this panel.
OnyX Log and Diagnostic Reports
The Log panel displays two tabs which access the OnyX Log or its Diagnostic Reports.
