Step by Step Instructions on How to Format a Mac Hard Drive
Posted: June 18th, 2013 | Author: admin | Filed under: Uncategorized | No Comments »Want to start fresh with your Mac? Decided to start over from scratch or just need to erase everything before selling it or giving it away? Whatever the reason is for wanting or needing to format your Mac’s hard drive you have to consider a few things first, because exactly how to format a hard drive on a Mac will depend on a few things, such as what type of hard drive you are formatting. This is because, the steps for formatting an internal drive will be different from those you would use to format an external drive.
Questions to know before you format Mac’s hard drive:
- Are you formatting an internal or external hard drive?
- If it is an internal drive, is it partitioned or do you plan on formatting the entire drive?
- Other things you should consider before formatting any drive is what the drive is going to be used for. For example, if it is an external drive, are you planning on using it only on Mac computers, or would you like to be able to use it on Windows PC’s as well?
- Because each operating system has its own format, you need to know the best format to choose. FAT 32 is compatible with both Mac’s and Windows based PCs. HFS+ is the normal Mac file system, and NTFS is the normal file system for Windows. Mac computers can read NTFS formatted drives, but they cannot write to them.

Before Formatting Your Mac’s Hard Drive
Once you have some information in mind from the questions above and you’re ready to format a Mac hard drive, internal or external, you should make sure that all of your data is backed up. When formatting an external drive, everything on that drive will be deleted and you will not be able to recover it. When formatting an internal drive, you will be returning it to the factory state, which means that all of your personal data and information will be deleted.
Now you can move on to the next step. Choose the steps for your needs, which will be either formatting an internal hard drive on a Mac or formatting an external hard drive on a Mac.
Formatting an Internal Hard Drive on Mac
When you format an internal hard drive on your Mac, you are giving it a completely fresh start. The drive will look, and act the same as it did when you first purchased the computer. Many people use formatting as a way to clean their personal information from a drive before donating or selling it, or to clean a system after a virus or other form of malware.
To format your internal drive you will need the Mac OS X installation disc that came with your computer when you first purchased it. Once you have the disk ready:
- Insert the OS X installation disc and restart your computer. Hold down the C key while the Mac reboots so that it boots directly from the disc.
- Double click on the ‘Install Mac OS X’ icon.
- You will be given an opportunity to click on an ‘Options’ button which will allow you to save existing files. You will also see an option to ‘Archive and Install’ and another option to ‘Preserve Users and Network Settings’. The last option you will see is to ‘Erase and Install’, if you are sure that you want to erase everything, select this option.
- From here on, the install disk itself will do the majority of the work and guide you through the rest of the process.
Formatting an Internal Hard Drive Partition or an External Hard Drive

- If you are formatting an external hard drive, ensure that it is plugged in, and recognized by your Mac before you begin. If you are formatting an internal hard drive partition, ensure that the drive is partitioned and you know which partition you want to format.
- Open ‘Finder’ either by using the icon in the dock or through Spotlight.
- Click on ‘Applications’ in the list on the left.
- Scroll down the list on the right until you find a folder called ‘Utilities’, double click on this folder.
- Once the folder opens, you will see an application called ‘Disk Utility’, double click on it.
- In Disk Utility, find the hard drive that you want to format and highlight it. If it is an external drive, it will appear in the left navigation bar. If it is an internal drive partition, it should also appear in the left navigation bar, listed under the name that you gave it when you partitioned the drive.
- On the right side, you will see a tab that says ‘Erase’, click on it to erase the data on the drive.
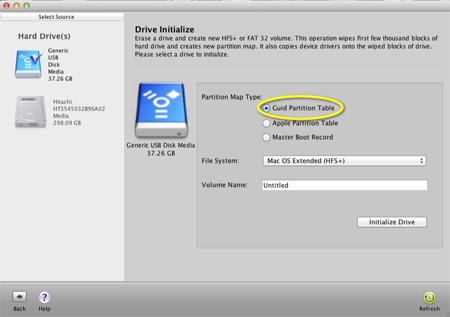
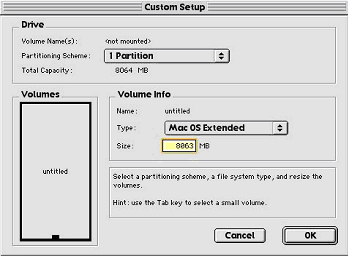
- Underneath the Erase tab, you will see a ‘Format’ option. It is here that you will see a drop down menu where you can choose what file system you want to use. If you are planning on using the drive with both Mac and Windows based computers, choose MS-DOS (FAT). If you are only going to use the drive with Mac computers, choose Mac OS Extended (Journaled).
After you have chosen the file format you want to use, press the ‘Erase’ button to begin the formatting process.

Leave a Reply